
How to Grow Bean Sprouts in a Jar
Contents
- 1 A Complete, Safe, and Beginner-Friendly Home Guide
- 2 What Are Bean Sprouts?
- 3 Why Grow Bean Sprouts in a Jar?
- 4 Materials You Need (Minimal Setup)
- 5 Step-by-Step: How to Grow Bean Sprouts in a Jar
- 6 Ideal Growing Conditions
- 7 Common Problems & How to Fix Them
- 8 Food Safety & Hygiene (Important)
- 9 Nutritional Changes During Sprouting
- 10 How to Store Fresh Bean Sprouts
- 11 Jar-Grown vs Store-Bought Bean Sprouts
- 12 Frequently Asked Questions
- 13 Related Guides & Tools
- 14 References & Data Sources
A Complete, Safe, and Beginner-Friendly Home Guide

Growing bean sprouts in a jar is one of the simplest and most reliable ways to produce fresh, crunchy sprouts at home. With just a handful of mung beans, clean water, and a glass jar, you can harvest nutrient-rich bean sprouts in as little as 4–5 days—no soil, no sunlight, and no special equipment required.
This guide goes far beyond basic instructions. You’ll learn why the jar method works, how to avoid common failures, how to grow sprouts safely, and how homegrown bean sprouts compare to store-bought ones in freshness, nutrition, and cost.
Whether you’re a beginner, a plant-based eater, or simply curious about sprouting, this is a complete, science-backed guide you can trust.
What Are Bean Sprouts?
Bean sprouts are young shoots grown from germinated edible beans. When people say “bean sprouts,” they usually mean mung bean sprouts, which are pale, crunchy, and mild in flavor.
Common Types of Bean Sprouts
- Mung bean sprouts – The most common type; ideal for raw eating and jar sprouting
- Soybean sprouts – Thicker, more fibrous; usually cooked before eating
This guide focuses primarily on mung bean sprouts, as they are the safest, fastest, and most suitable for home sprouting in jars.
Bean Sprouts vs Other Sprouts
Bean sprouts differ from other sprouts and microgreens in a few key ways:
- They are typically grown in darkness
- They rely on stored energy in the seed, not photosynthesis
- They are harvested very young (usually within 3–6 days)
Why Grow Bean Sprouts in a Jar?
The jar method is the most popular way to grow bean sprouts at home—and for good reason.
Advantages of the Jar Method
- Excellent drainage – Prevents standing water and rot
- Good airflow – Reduces bacterial and mold growth
- Low cost – No trays, soil, or lights required
- Easy to clean – Glass jars are non-porous and hygienic
- Beginner-friendly – Hard to overcomplicate
Jar vs Tray vs Store-Bought Sprouts
| Feature | Jar-Grown | Tray-Grown | Store-Bought |
|---|---|---|---|
| Freshness | Very high | High | Variable |
| Cost | Very low | Low | Higher |
| Food safety control | High | Medium | Unknown |
| Equipment needed | Minimal | Moderate | None |
| Taste & crunch | Excellent | Excellent | Often softer |
Materials You Need (Minimal Setup)
You don’t need special sprouting equipment. Keep it simple.
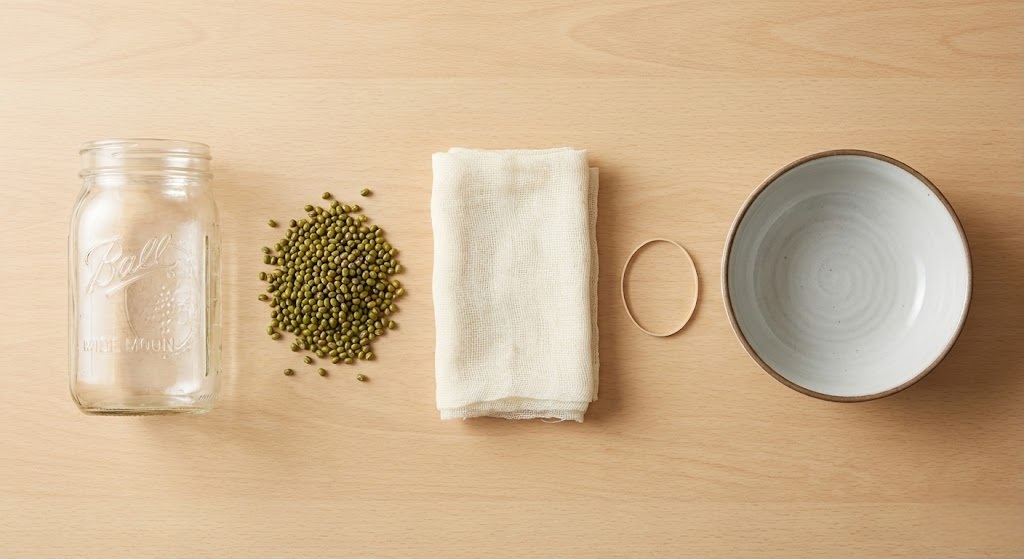
Essential Materials
- Edible-grade mung beans (raw, untreated, not for planting)
- Glass jar (500 ml–1 liter works best)
- Breathable lid
- Mesh lid
- Cheesecloth
- Clean cotton cloth + rubber band
- Clean drinking water
Optional (Helpful but Not Required)
- Jar stand or bowl to keep the jar tilted
- Kitchen thermometer (for warm climates)
Step-by-Step: How to Grow Bean Sprouts in a Jar
This is the core process. Follow it carefully, and success is very consistent.
Step 1: Choose and Rinse the Beans
Use mung beans sold for food, not garden seeds. Planting seeds may be chemically treated and unsafe for consumption.
- Measure 1–2 tablespoons of mung beans
- Rinse thoroughly under running water
- Remove broken or floating beans
Less is more. Overcrowding is one of the most common beginner mistakes.
Step 2: Soaking (8–12 Hours)
Soaking activates the germination process.
- Place rinsed beans in the jar
- Add plenty of clean water
- Soak for 8–12 hours at room temperature
After soaking, the beans should look swollen and hydrated.
Step 3: Drain Completely (Critical Step)
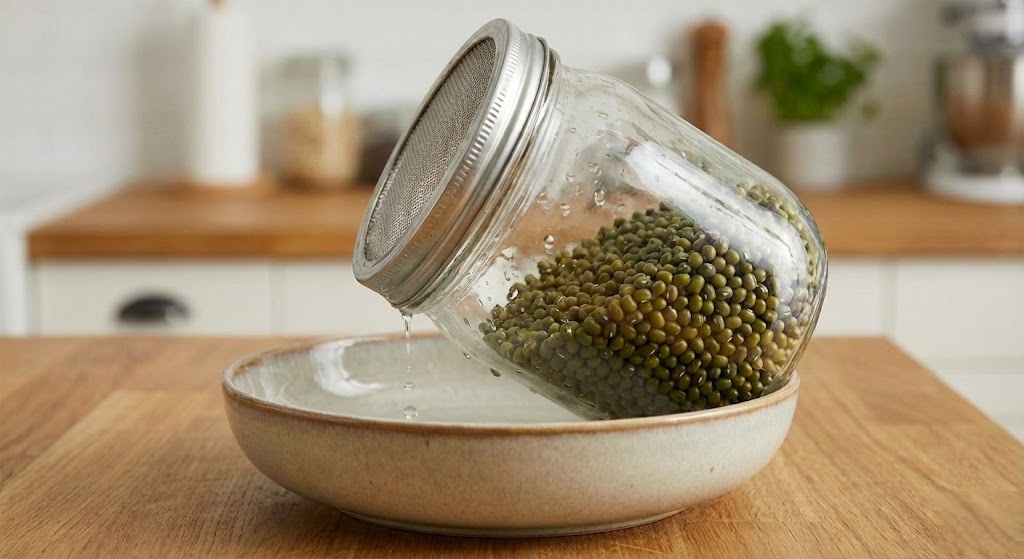
This step determines success or failure.
- Drain all soaking water
- Rinse once more
- Drain again until no water drips out
Tilt the jar upside down at a 45-degree angle to allow excess moisture to escape.
Standing water causes sour smells, slime, and bacterial growth.
Step 4: Sprouting & Daily Rinsing
Place the jar in a dark or dim area at room temperature.
- Rinse and drain 2–3 times per day
- Always drain thoroughly
- Keep beans moist, not wet
Within 24 hours, you’ll see tiny white roots.
Step 5: Growth Timeline (Day 1–5)
Typical jar-grown mung bean sprout development:
- Day 1: Beans crack open, roots appear
- Day 2: Short white shoots form
- Day 3: Sprouts thicken and elongate
- Day 4–5: Ready to harvest (1–2 cm shoots)
Longer is not better. Overgrown sprouts lose crunch and freshness.
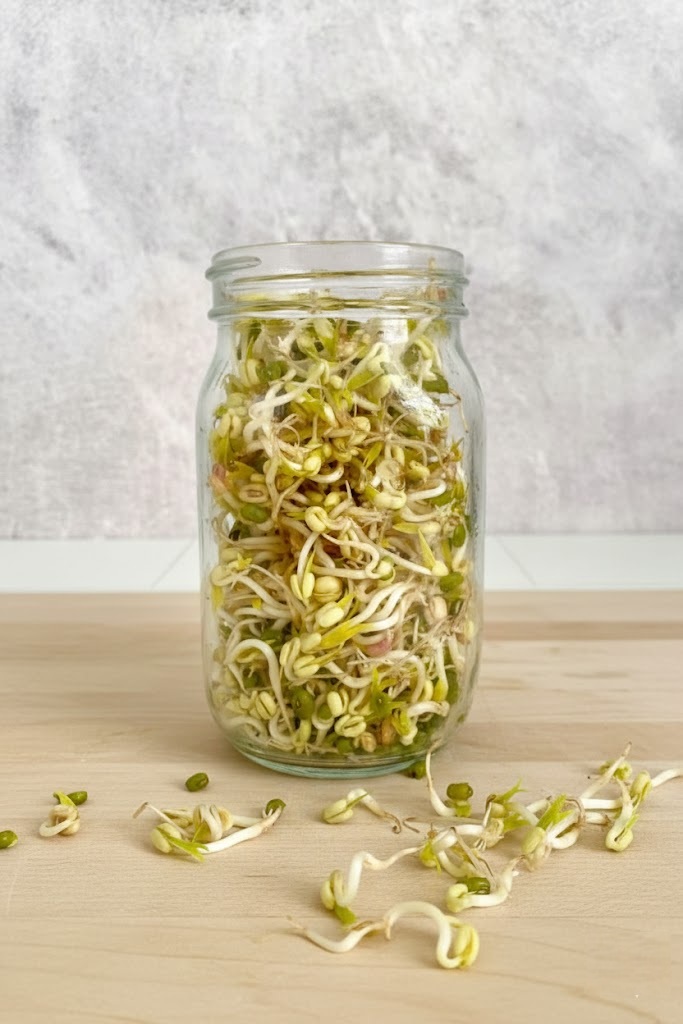
Step 6: Harvesting
Harvest when sprouts reach 1–2 cm and still look crisp and pale.
- Give a final rinse
- Drain well
- Remove loose seed coats (optional)
Ideal Growing Conditions
Temperature
- Best range: 18–24°C (65–75°F)
- Too cold → slow growth
- Too hot → spoilage risk
Light
- Darkness encourages thicker, whiter sprouts
- Light exposure turns sprouts green and bitter
Airflow
- Essential for preventing mold
- Never seal the jar airtight
Common Problems & How to Fix Them
Slimy Sprouts
Cause: Poor drainage or overcrowding
Fix:
- Use fewer beans
- Drain more thoroughly
- Increase airflow
Sour or Rotten Smell
Cause: Bacterial fermentation
Fix:
- Discard batch
- Clean jar thoroughly
- Rinse more frequently next time
Fresh sprouts smell clean and mildly nutty.
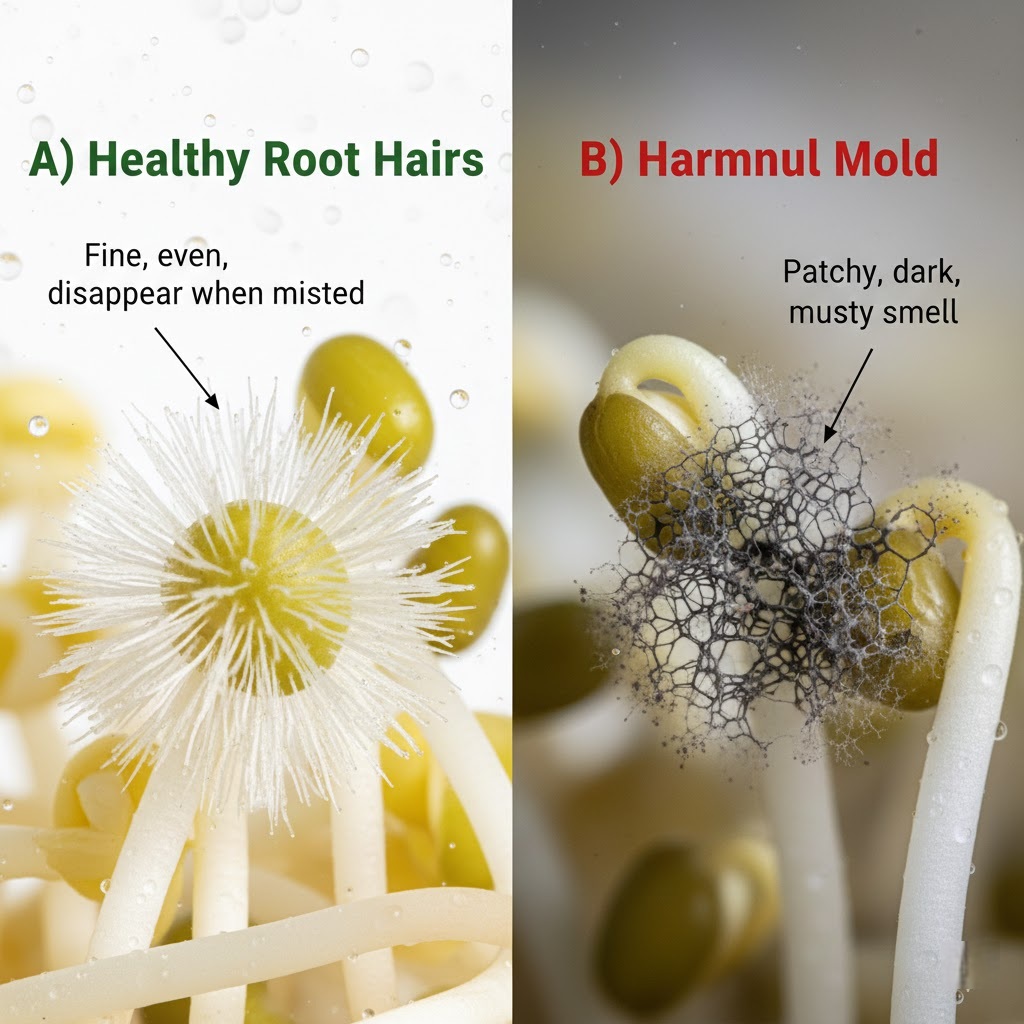
Mold vs Root Hairs (Very Common Confusion)
| Feature | Root Hairs | Mold |
|---|---|---|
| Color | White | White/gray |
| Smell | Neutral | Musty |
| Location | On roots | On seeds/sprouts |
| Reaction to rinse | Disappears | Stays |
If unsure, discard the batch.
Uneven Growth
Cause: Beans clumping together
Fix:
- Use fewer beans
- Shake jar gently after rinsing
Food Safety & Hygiene (Important)
Sprouts are nutritious—but they require careful handling.
Who Should Be Cautious
- Pregnant individuals
- Elderly
- Immunocompromised
These groups should cook sprouts before eating.
Safety Tips
- Use clean water
- Sterilize jars between batches
- Rinse consistently
- Discard at first sign of spoilage
Cooking bean sprouts eliminates most microbial risk.
Nutritional Changes During Sprouting
Sprouting transforms beans in several beneficial ways.
What Improves
- Protein digestibility
- Vitamin C content
- Enzyme activity
- Mineral bioavailability
What Decreases
- Some carbohydrates
- Antinutrients like phytic acid
Bean sprouts provide fresh-weight nutrition, meaning they are low in calories but rich in enzymes and micronutrients.
Want to see the exact protein and vitamin breakdown? Check our [Sprout Nutrition Comparison Tool].
How to Store Fresh Bean Sprouts
- Refrigerate immediately after harvest
- Store in a breathable container
- Best consumed within 2–3 days
Discard if sprouts become slimy or smell unpleasant.
Jar-Grown vs Store-Bought Bean Sprouts
| Aspect | Homegrown | Store-Bought |
|---|---|---|
| Harvest time | Minutes ago | Days old |
| Crunch | High | Often soft |
| Cost | Very low | Higher |
| Safety control | Full | Unknown |
Frequently Asked Questions
Can I grow bean sprouts without soaking?
No. Soaking is essential to activate germination.
Can I grow them longer than 5 days?
Yes, but texture and flavor decline after day 5.
Can I reuse the same jar?
Yes—wash and sanitize thoroughly.
Do bean sprouts need sunlight?
No. Darkness produces better sprouts.
Related Guides & Tools
- Bean Sprouts Nutrition Guide
- Sprout Nutrition Comparison Tool
- Mung Bean Sprouts Safety Guide
- How to Grow Lentil Sprouts in a Jar
References & Data Sources
- https://www.fda.gov/food/buy-store-serve-safe-food/sprouts
- https://fdc.nal.usda.gov
- https://extension.umn.edu
- https://pubmed.ncbi.nlm.nih.gov
- https://www.ncbi.nlm.nih.gov/books
Final Note
Growing bean sprouts in a jar is one of the most accessible ways to start sprouting at home. When done correctly, it’s safe, economical, and deeply satisfying—producing fresh food in just a few days.
If you master this method, you’ll have the foundation to grow many other sprouts with confidence.