
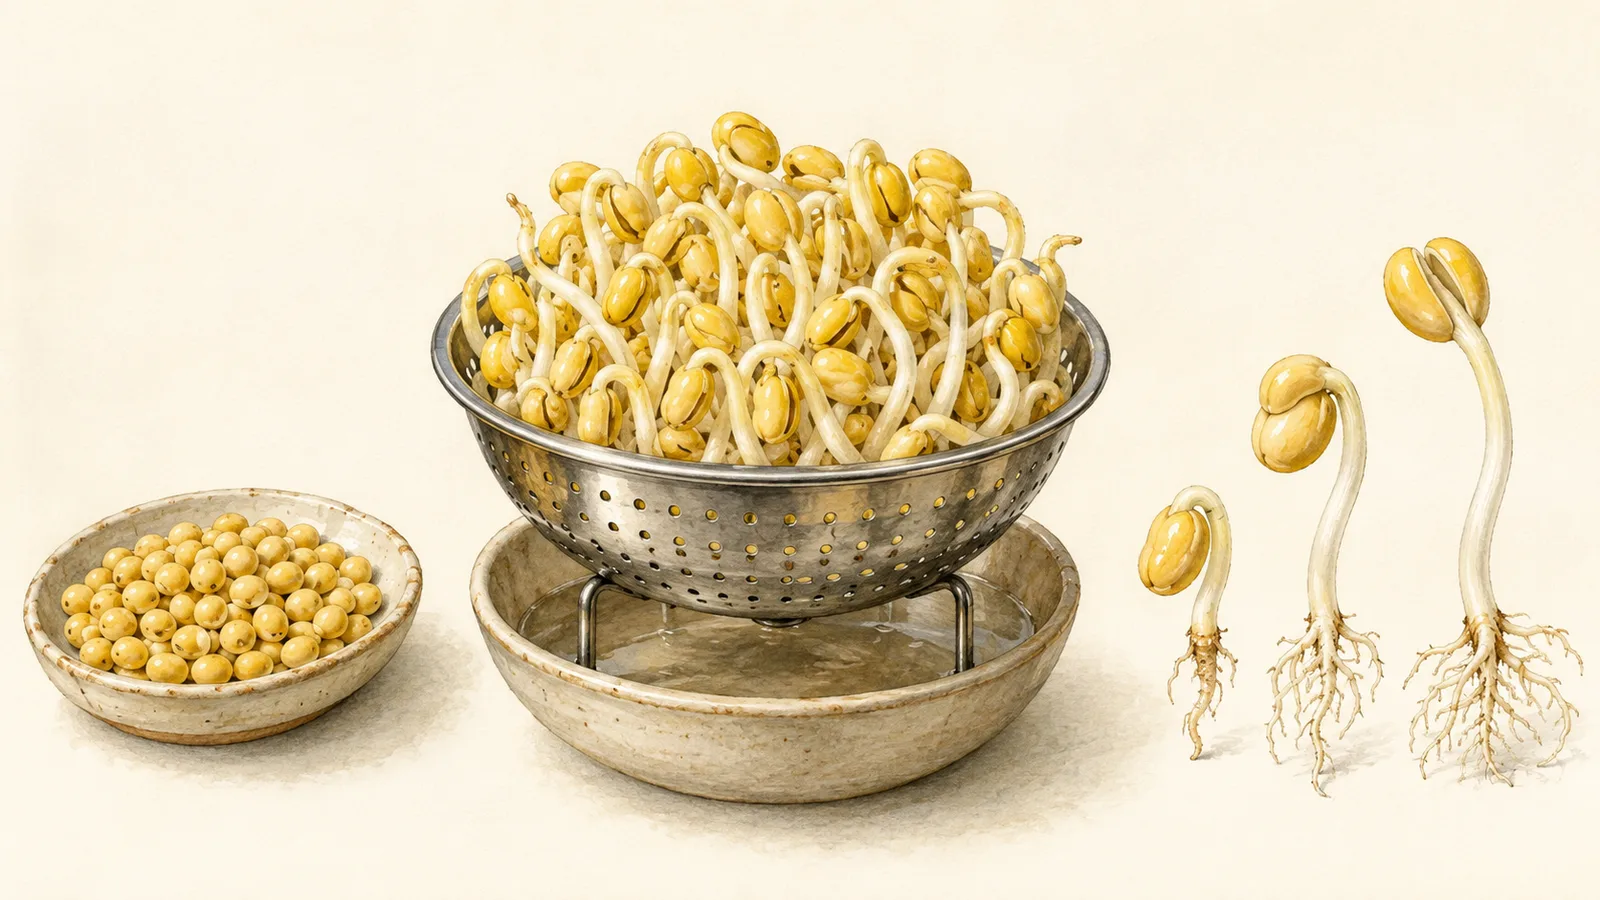
To grow soybean sprouts at home, start with whole soybeans sold for sprouting, soak according to the supplier’s instructions, then grow them in a draining container with regular fresh-water rinses. For the familiar long, yellow-headed Korean kongnamul, keep light out while allowing air to circulate. Plan the watering routine before you soak the beans: a container that drains well is only useful if someone can tend it.
This guide focuses on the growing process. Our soybean sprouts overview covers their nutritional profile, and the sprout variety guide helps distinguish soybeans from other edible sprouts.
Make cooking part of the plan. Home-grown sprouts can carry foodborne pathogens even when equipment looks clean. CDC lists raw or undercooked sprouts as a riskier food and steaming-hot cooked sprouts as the safer option. Do not taste a growing batch raw to decide whether it is ready.
Choose Beans That Can Actually Sprout
Look for a clearly identified lot of whole, untreated soybeans intended for food sprouting. For Korean-style sprouts, the label may say kongnamul kong. Keep the supplier’s instructions and lot information until the batch has been used. A bag of beans for tofu or soy milk may be viable, but it gives you less useful information about sprouting performance.
| What you have | Decision | Reason |
|---|---|---|
| Whole soybeans labeled for sprouting | Best starting point | The intended use and growing directions are clear |
| Split, roasted or cooked soybeans | Do not use | They are not an intact, viable seed for this process |
| Frozen edamame | Choose dried sprouting seed instead | This is an immature food product, often blanched, rather than a sprouting lot |
| Garden seed treated with chemicals | Do not use for food sprouts | Planting seed is not interchangeable with food-sprouting seed |
“Organic” describes a production standard; it does not promise germination or a pathogen-free batch. If a new bag repeatedly produces very uneven growth, try another sprouting lot rather than repeatedly extending the wet growing period.
Build the Setup Around Drainage
Use a clean food-contact colander or purpose-made sprouter with holes small enough to retain the beans. Suspend it above a separate catch bowl so the bottom never rests in collected water. Add a loose, clean opaque cover that blocks light without sealing the container. No soil or fertilizer is needed for this countertop method.
Before adding beans, pour water through the empty setup. Watch where it collects, whether a cloth blocks the holes, and whether the catch bowl touches the underside. This simple rehearsal exposes problems that become harder to see once roots fill the container.
Start with a modest quantity that your container can accommodate after swelling and growth. A deep pile makes the center harder to rinse and inspect. Record the dry weight if you want to compare later batches; there is little value in recording a precise weight while changing the container and seed lot at the same time.
Moist beans. Clear drainage.
Room to grow.
A successful setup makes the next watering easy—and lets you see what is happening underneath.
01
Soak
Follow the seed supplier’s timing.
02
Drain
Keep the base above collected water.
03
Tend
Fresh water, airflow and an opaque cover.
04
Harvest + cook
Development first; then heat thoroughly.
A method-specific timeline
Based on the linked kongnamul recipe. Blocks show stages, not a proportional scale or a food-safety guarantee. Use your supplier’s instructions for your seeds.
Soaking and Watering: Choose One Coherent Method
Instructions differ because growers target different seed lots, containers and sprout lengths. Follow the directions supplied with your beans instead of combining the shortest soak from one guide with the longest harvest time from another.
For a documented long-sprout method, Maangchi’s kongnamul tutorial uses sprouting soybeans, a 24-hour soak, a perforated container and a dark cloth. It calls for watering every 3–4 hours and describes a 4–6 day growing period toward roughly 4-inch sprouts. These are that recipe’s parameters, not a universal safety schedule. If your seed supplier gives a different soak, use its instructions for that lot.
After soaking, discard the soak water, rinse the beans and transfer them to the draining container. Remove damaged beans during preparation. Between waterings, the beans should retain moisture while surplus water can escape. The Sproutpeople basics guide separates rinsing, which supplies moisture, from draining, which controls what remains, and emphasizes airflow between cycles.
Use fresh potable water each time and empty the catch bowl. Keep the setup away from raw-meat preparation, sink splash and pets. Follow equipment cleaning directions between batches. Do not improvise a bleach or peroxide seed treatment from a household-cleaning recipe.
A useful growing record has four fields: time watered, whether drainage cleared, appearance of the center of the batch, and any change in odor. If the selected method requires frequent attention that your schedule cannot support, postpone the batch. Extra water left in the bowl is not a substitute for the next rinse.
Read the Sprouts, Not Just the Calendar
The visual below is a sequence of checkpoints, not a prediction that every bean reaches a particular length on a particular day. Soybeans within one batch will not all look identical.
- After soaking: the beans have swollen. Check that the holes still drain and the beans are not trapped under a heavy, wet cover.
- Early germination: roots begin to emerge. Compare several beans from different parts of the container rather than inspecting only the fastest one at the edge.
- Stem growth: shoots lengthen and the large seed leaves remain attached. Check beneath the growing mat, where standing water is easiest to miss.
- Harvest decision: assess development against the chosen method, remove loose hulls and rinse. A harvest-sized sprout is still raw and requires cooking.
Keep an opaque cover in place for yellow-headed kongnamul. Greening suggests light exposure; it is a quality observation, not proof that the batch is either safe or unsafe. Avoid adding heat to force a slow batch to catch up. Warmer, wetter conditions also favor microbial growth.
Troubleshooting: What to Change Next Time
| Observation | Possible explanation | Next action |
|---|---|---|
| Only a few beans germinate | Low viability or an unsuitable lot | Recheck the label and instructions; use a fresh sprouting lot for the next batch |
| Water stays beneath the beans | Blocked holes, a crowded mat or inadequate clearance | Correct the container arrangement; do not treat drainage repair as proof of safety for the current batch |
| Yellow heads turn green | Light reaches the seedlings | Improve the opaque cover while preserving airflow |
| Sprouts are uneven or tangled | Seed variation, container shape or crowding | Compare growth across the batch; try a smaller load next time |
| Slime, mold, rotting beans or an offensive odor | Spoilage is possible | Discard the batch; clean the equipment before restarting |
These are possible explanations, not a diagnostic test. A photograph cannot establish that sprouts are pathogen-free. Do not rescue visibly spoiled sprouts by rinsing them harder, trimming away a patch, or cooking them into soup. Conversely, clean-looking sprouts can still harbor harmful bacteria.
Harvest, Refrigerate and Cook
Harvest with clean hands and utensils, rinse under running water and drain. Refrigerate promptly at 40°F (4°C) or below. Keep the batch separate from raw animal foods, label it with the harvest date and plan to use it promptly. A date label helps you track the food; it does not extend shelf life.
Cook the sprouts thoroughly, including the substantial yellow bean heads. Choose a tested soybean-sprout recipe for the dish and quantity you are making; a brief dip that merely softens the stems is not a reliable substitute. The cooked sprouts should be steaming hot throughout. Soy remains a food allergen after germination and cooking.
FDA produce guidance explains that bacteria on or in seeds can multiply during home sprouting. Washing does not eliminate that risk. Pregnant people, young children, older adults and people with weakened immune systems should avoid raw or lightly cooked sprouts.
Questions Before Your First Batch
Can I grow soybean sprouts in a jar?
A draining sprouting jar can work for a small batch if its instructions cover soybeans and there is room for expansion. For longer kongnamul, a colander makes it easier to spread the beans, inspect the base and rinse the entire batch. Choose the container for the method you intend to follow.
How long do soybean sprouts take to grow?
Expect several days after soaking, with the actual harvest point depending on the seed lot and desired development. The cited kongnamul method gives 4–6 growing days. Do not keep a deteriorating batch wet simply because it has not reached the advertised length.
Do I need to put a weight on the sprouts?
This guide does not require one. First establish reliable drainage and even growth. A heavy improvised weight adds another food-contact surface and can make inspection more difficult; use one only as part of a sprouter’s specific instructions.
Are these the same as mung bean sprouts?
No. Soybean sprouts have conspicuous yellow bean heads and are called kongnamul in Korean. Mung beans are another species and are used for sukju. Check the seed name rather than relying on the broad label “bean sprouts.” See our mung bean guide for that crop.
Does growing them myself make them safer to eat raw?
No. Clean equipment matters, but it cannot rule out contamination inside a seed. Treat growing success and food safety as separate questions, and finish with thorough cooking.
Sources and Editorial Notes
- Maangchi: Soybean sprouts (Kongnamul) — attributed example of a long-sprout growing method.
- Sproutpeople: Sprouting Basics — moisture, drainage and airflow principles.
- FDA: Selecting and Serving Produce Safely — home-sprouting risk and produce handling.
- CDC: Safer Food Choices — raw versus thoroughly cooked sprouts.
Editorial note: Sources reviewed September 7, 2026. This is a researched growing guide, not a report of a controlled growing trial. The setup suggestions and observation checklist are editorial guidance. The original illustration and motion diagram explain the process; they are not photographs of a tested batch or a microbial-safety test.